# Webinterface
Open the device IP address in your browser to access Dashboard, Options, Sensors & Buttons, Test Area, Statistics, Pixel Gallery, Pixel Creator and Update & Backup. The WebUI communicates with the device over WebSocket port 81; both HTTP port 80 and WebSocket port 81 must be reachable.
# Demo
Try the hosted demo (opens new window). Device-changing actions are disabled in demo mode. Local editing tools can still be explored.
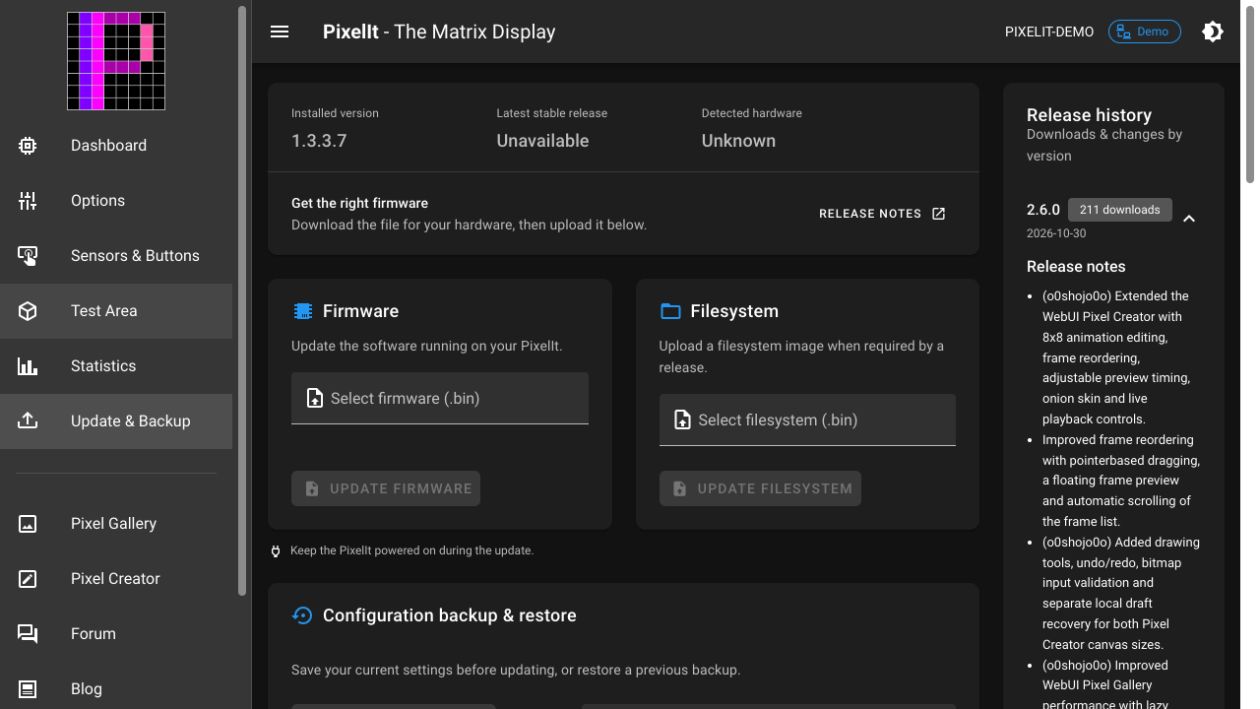
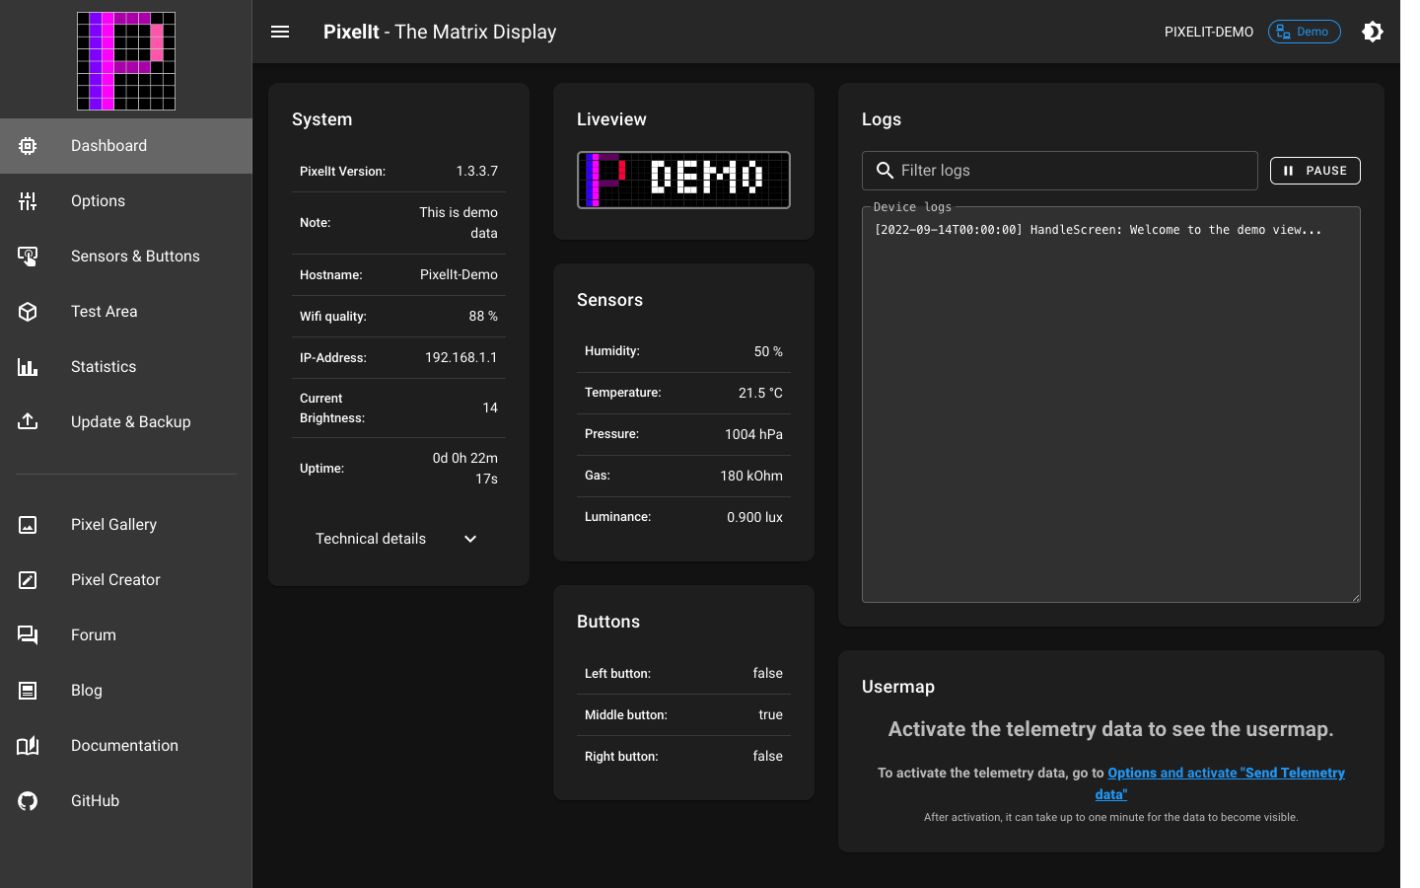
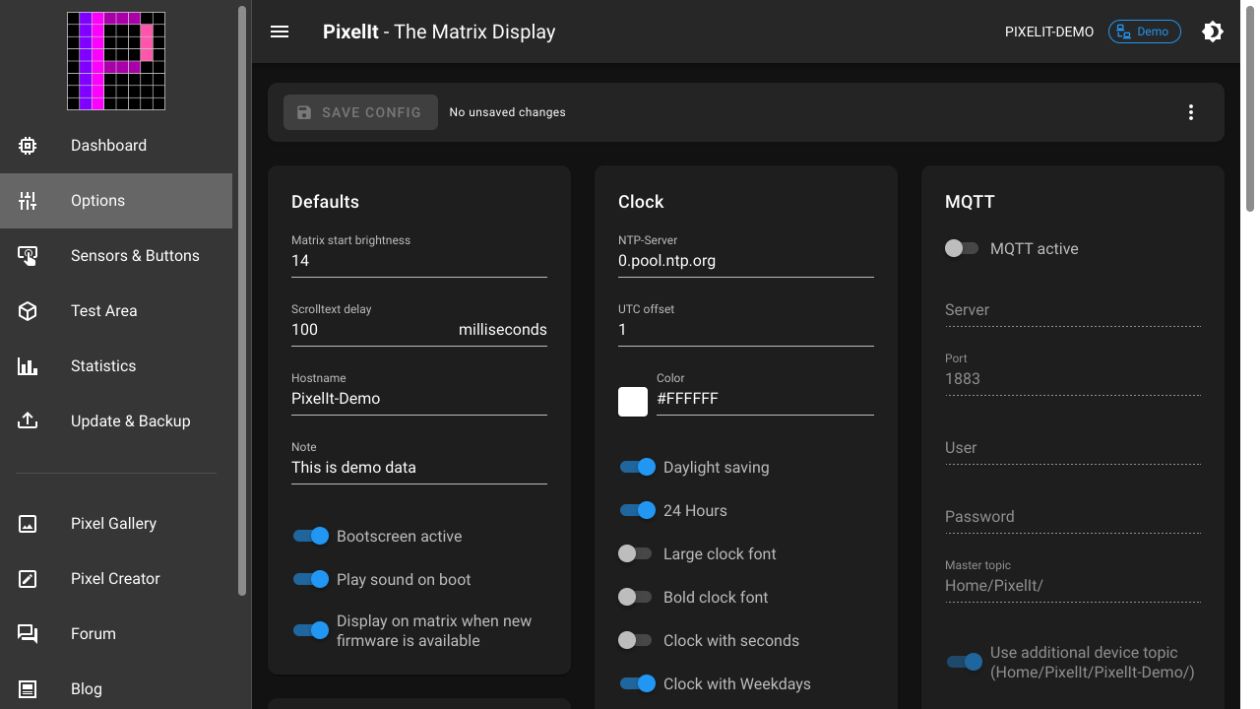
Screenshots below show the earlier 2.6.0 layout and do not include every 3.0.0 control. They were captured from the WebUI source available at the 2.6.0 release date (opens new window), using its built-in demo data. Displayed versions, pins and sensor values are sample data, not recommended settings or firmware defaults. The hosted demo can change independently of the stable firmware.
# Dashboard
System details can be collapsed. Dashboard logs can be filtered and paused; see logs and diagnostics. Hidden WebUI tabs pause their Liveview preview; reopening the page resumes with the latest image. Slow previews can skip frames without implying that the physical LEDs skipped them.
# Options
Options and Sensors & Buttons keep separate configuration drafts. Save your edits using the sticky save toolbar, or discard them to return to the saved configuration. The WebUI warns you about unsaved changes.
# Matrix and clock settings
Choose the layout matching your matrix wiring and configure LED color correction, automatic brightness reference points, NTP time and clock fallback. See the configuration reference for layout values, correction profiles and calibration, and time and clock fallback for UTC offsets and the supported daylight-saving rule.
# Startup and transitions
Under Options → Defaults, choose Boot animation: Gradient letters (default) or Multicolor letters (classic). Enable Boot-Screen active to play it. Show WiFi screen during startup independently controls the complete connection screen and hotspot notice; it defaults to enabled. Save changes and restart to apply them.
Choose Clock/date transition separately from Fallback Animation. Auto uses Vertical Slide with small clock fonts and a slower Fade with the large font. Clock Auto Fallback offers all ten standalone effects and Random Wipe. See time and clock fallback for stored numeric values.
# Telemetry and update notifications
Telemetry uploads and matrix update notifications are independent options. See Telemetry and update notifications for the transmitted data, service addresses, timing and how to disable each option. Matrix update notifications do not install firmware automatically.
# Play sound on boot
With a configured DFPlayer Mini, this option plays track index 1 at startup using the initial volume setting. File-copy order can affect that index; see Sound Option 2.
Enable Include beta releases in update searches only if you want published prereleases offered in addition to stable firmware. It defaults to off; save to apply it. Update notifications announce releases but never install them automatically. During a manual firmware upload, the matrix shows animated progress and a reboot screen.
# MQTT
If you have a working MQTT server, you can enable this option to receive messages through a MQTT broker. The REST API remains available at the same time.
Enable Home Assistant discovery in the MQTT options to control display power and brightness and receive status information. See Home Assistant for setup, available entities and automation examples for sending screens. The PixelIt custom integration provides direct Home Assistant control and liveview without MQTT. Node-RED can also control PixelIt through MQTT.
Matrix-info MQTT updates default to every 15 seconds. Choose sensor updates when readings change or periodically, with separate thresholds and intervals. Use default thresholds fills the draft; save it to apply. See MQTT publishing intervals.
# Sensor & Buttons
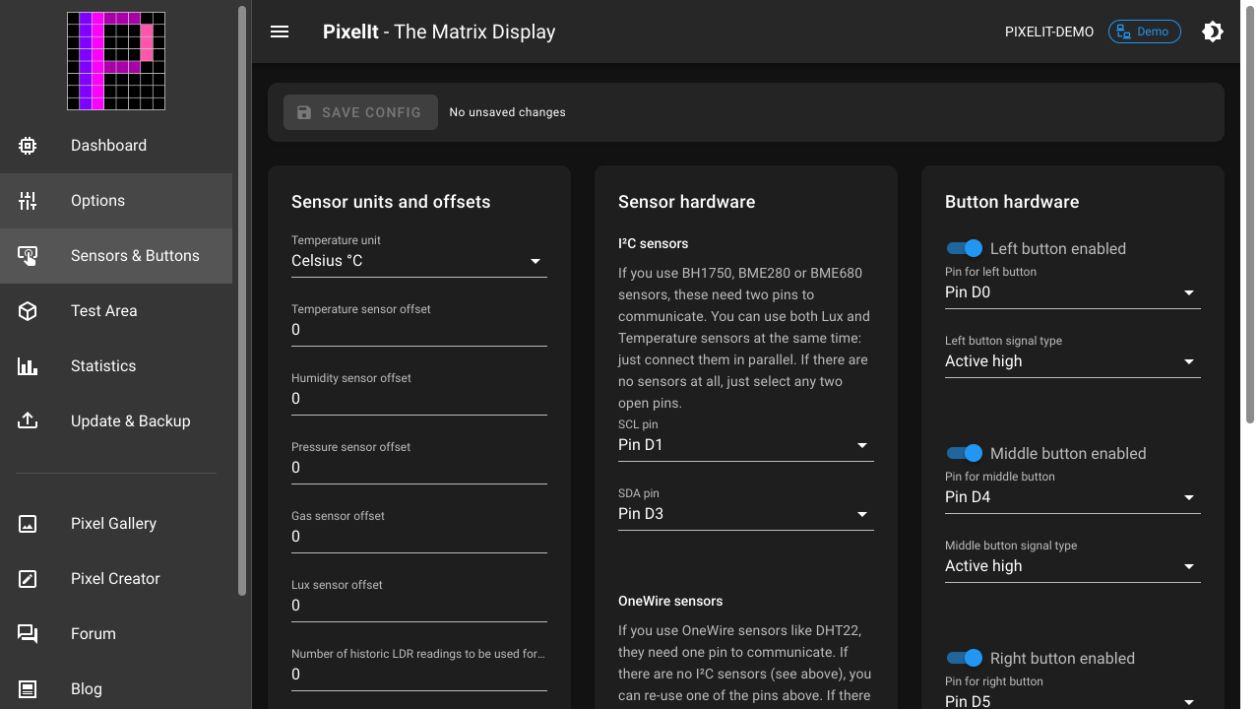
Configure sensor units and offsets, peripheral pins, button pressed levels and actions. Save changes to apply them and restart the device. Pin assignments must match your wiring. In particular, do not copy the demo's button levels onto ESP8266 boot pins.
# Test Area
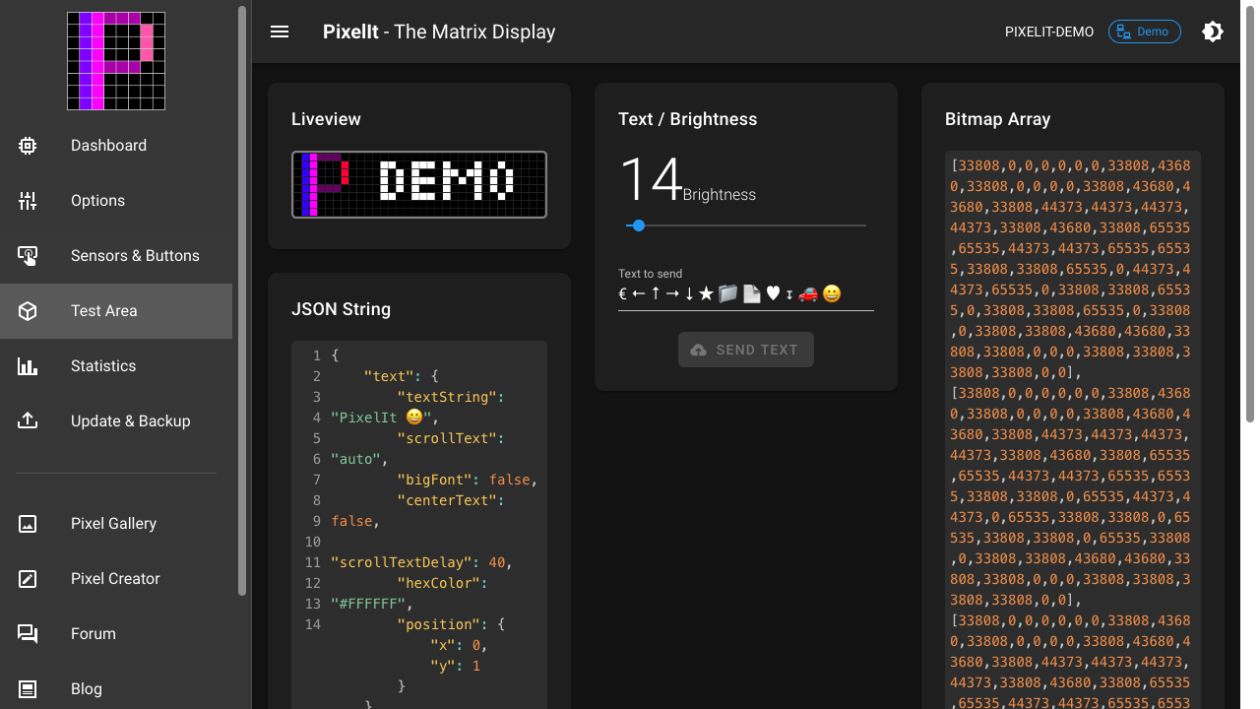
Send test text, adjust brightness or submit a JSON screen payload. Use the API examples for valid payloads. Test actions require a live device and are disabled in the demo.
# Statistics
View device statistics collected by the WebUI. These views depend on an active device connection and are separate from firmware configuration.
# Pixel Gallery
Browse shared artwork or open Pixel Creator from the navigation. See Tools for gallery IDs, drawing and animation workflows. The external gallery service is required for browsing artwork. Dimension/animation filters, compatibility labels, RGB565 copying and moderated reports are described in Tools.
# Update
For a manual update, download the firmware for your hardware. The WebUI provides hardware-specific release downloads, image compatibility warnings and a prompt to back up your configuration before uploading. Check these warnings before continuing. The update view shows upload progress and reports reconnect or error status.
For the latest stable firmware, use GitHub Releases / latest (opens new window). An ESP32 first-install image is for a full installation over USB; use the matching OTA image for updates through the WebUI. See Firmware for USB installation.